
Custom groups are local to Sales Navigator and do not sync with Salesforce. Custom groups can help you organize your data the way you work. For example, a popular way people use custom groups is to create a group visited and need to visit. Any data from Salesforce can be added to a custom group. In this post you will learn:
- How to create a custom group
- How to add contacts to a custom group
- How to edit and delete custom groups
Creating A Custom Group
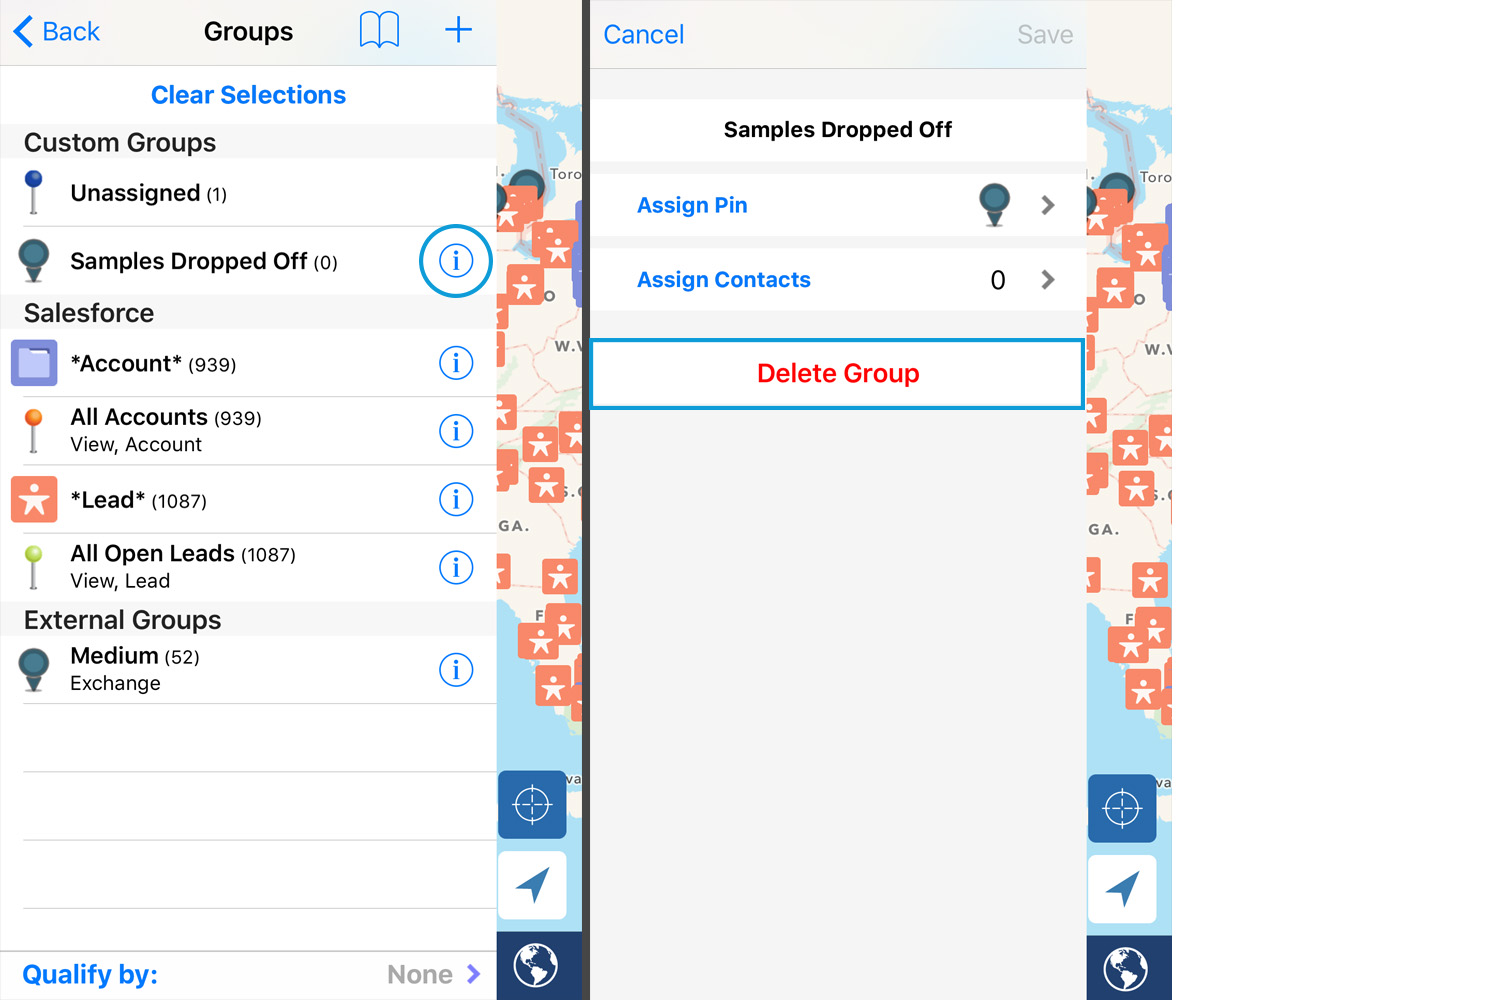
1. To create a custom group start by opening the app menu and tapping the groups icon ( ![]() ).
).
2. Tap the ( + ) in the upper right hand corner.
3. Choose ‘Custom Group’
4. Enter the name of the custom group, assign the group a pin and tap contacts to add them to the group.
5. Tap ‘Save’

How to Add/Remove Contacts from a Custom Group
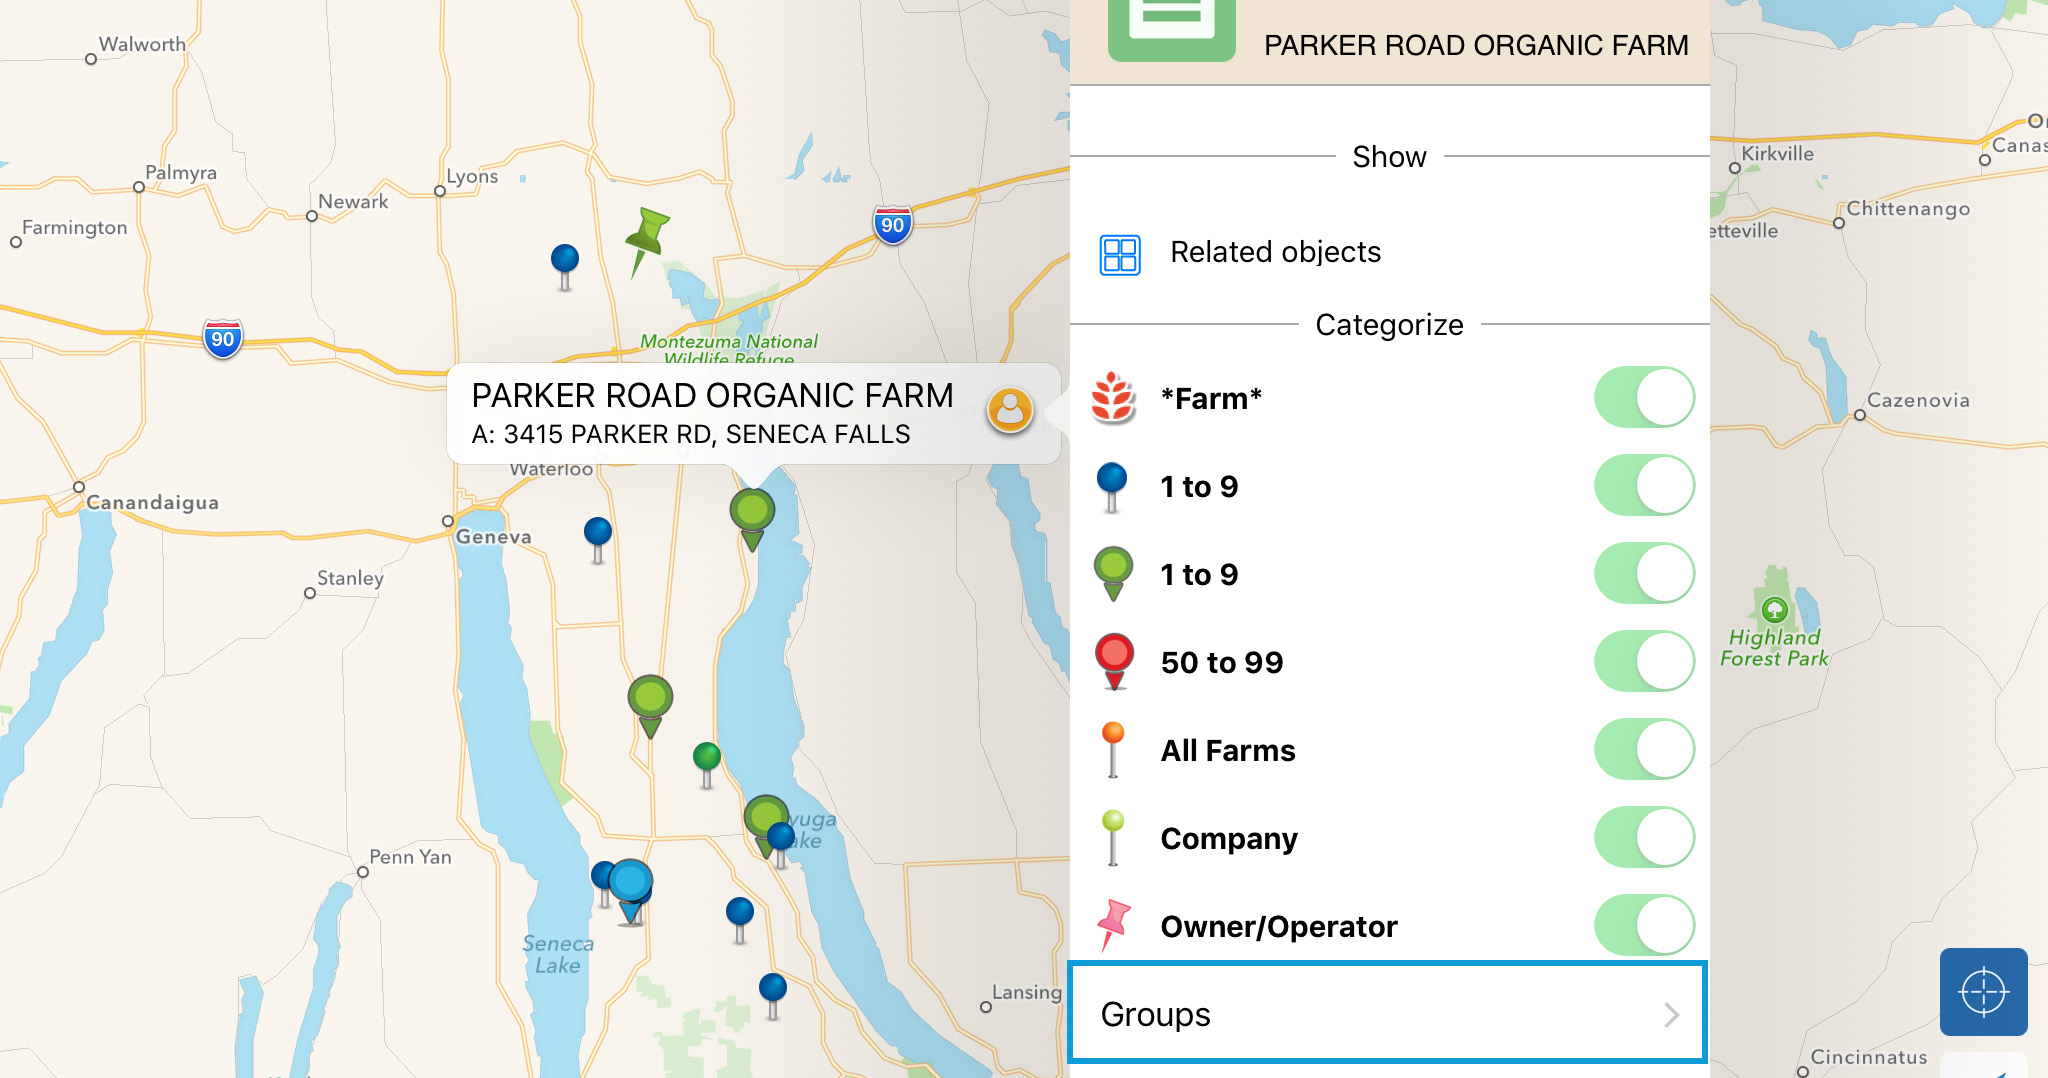
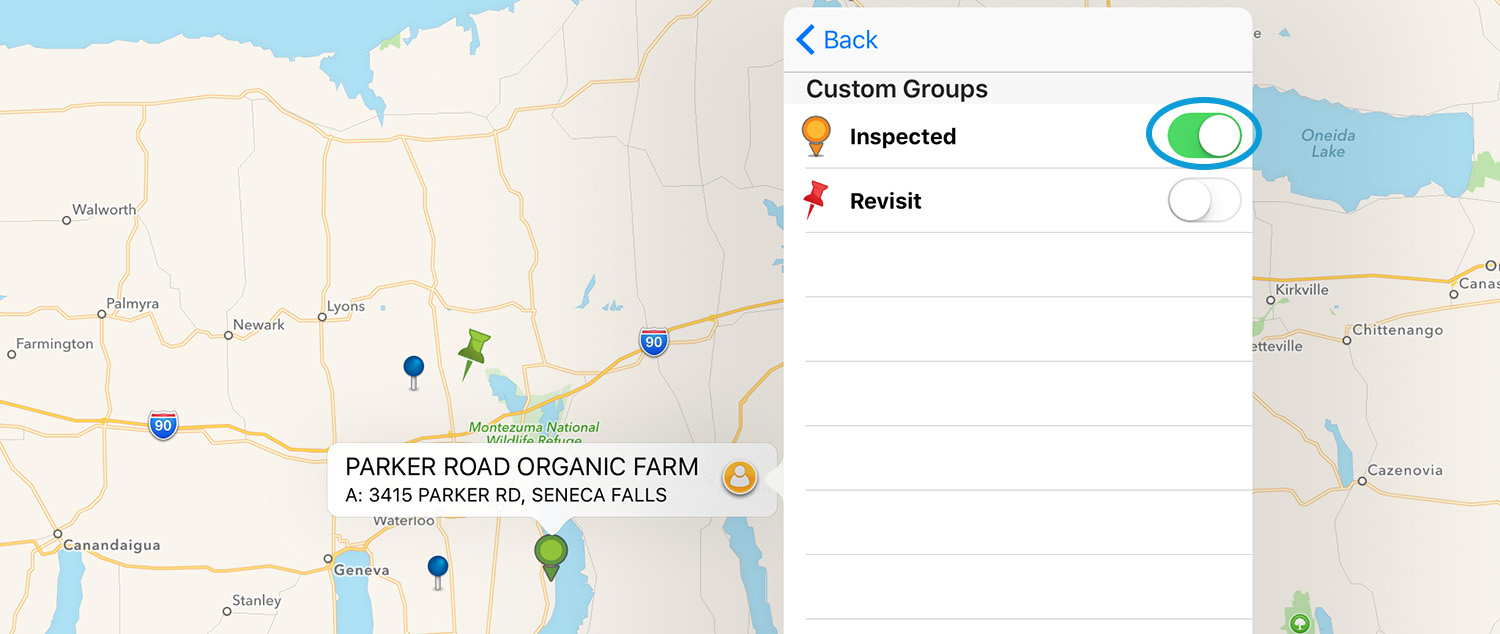
1. Open contact details window
2. Scroll down and tap ‘Groups >’
3. Toggle the custom group on/off
Edit/ Delete a Custom Group
1. To create a custom group start by opening the app menu and tapping the groups icon ( ![]() ).
).
2. Tap the information button ( ![]() )
)
3. Edit/Delete the Group.
Thank you for using Sales Navigator for Salesforce! If you have any other questions or feedback, please contact us here.