
Daily sales routes are automatically generated in Sales Navigator using set appointments from your iOS device and meeting tasks from Salesforce. In this post learn how to:
- Add start and end locations/times to your trips
- Add an appointment or meeting task to your route
- Use Sales Navigator schedule optimizer
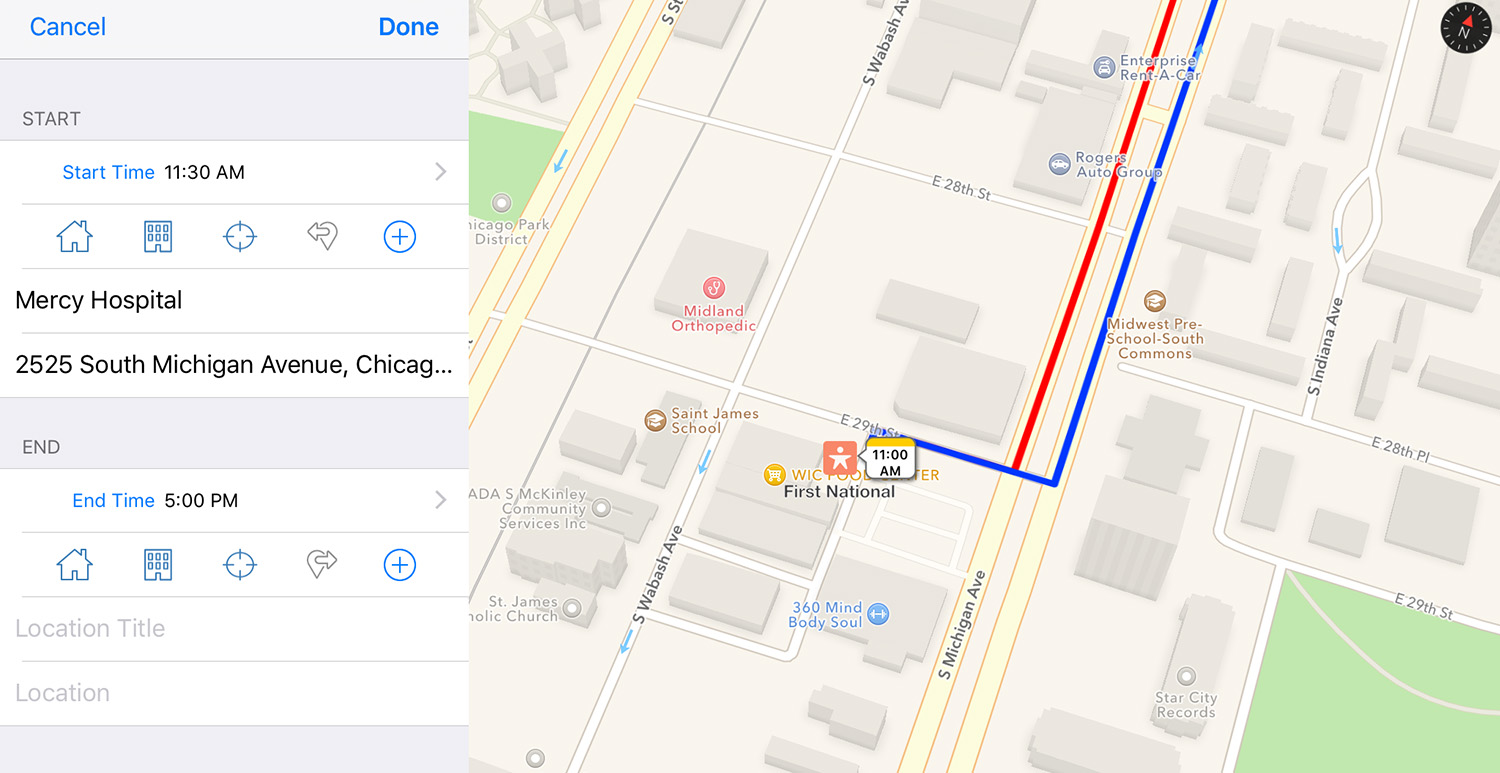
Adding Start/End Time and Location
Open the trips menu and start by tapping the start or end box. Tap the quick buttons to quickly set your home address ( ![]() ), work address (
), work address ( ![]() ), current location (
), current location ( ![]() ), or previous ending address (
), or previous ending address ( ![]() ) as your starting location. Quick button presets can be added in the app settings.
) as your starting location. Quick button presets can be added in the app settings.
Also, you can add the address of a contact as your starting or ending location by tapping the addition ( ![]() ) icon.
) icon.
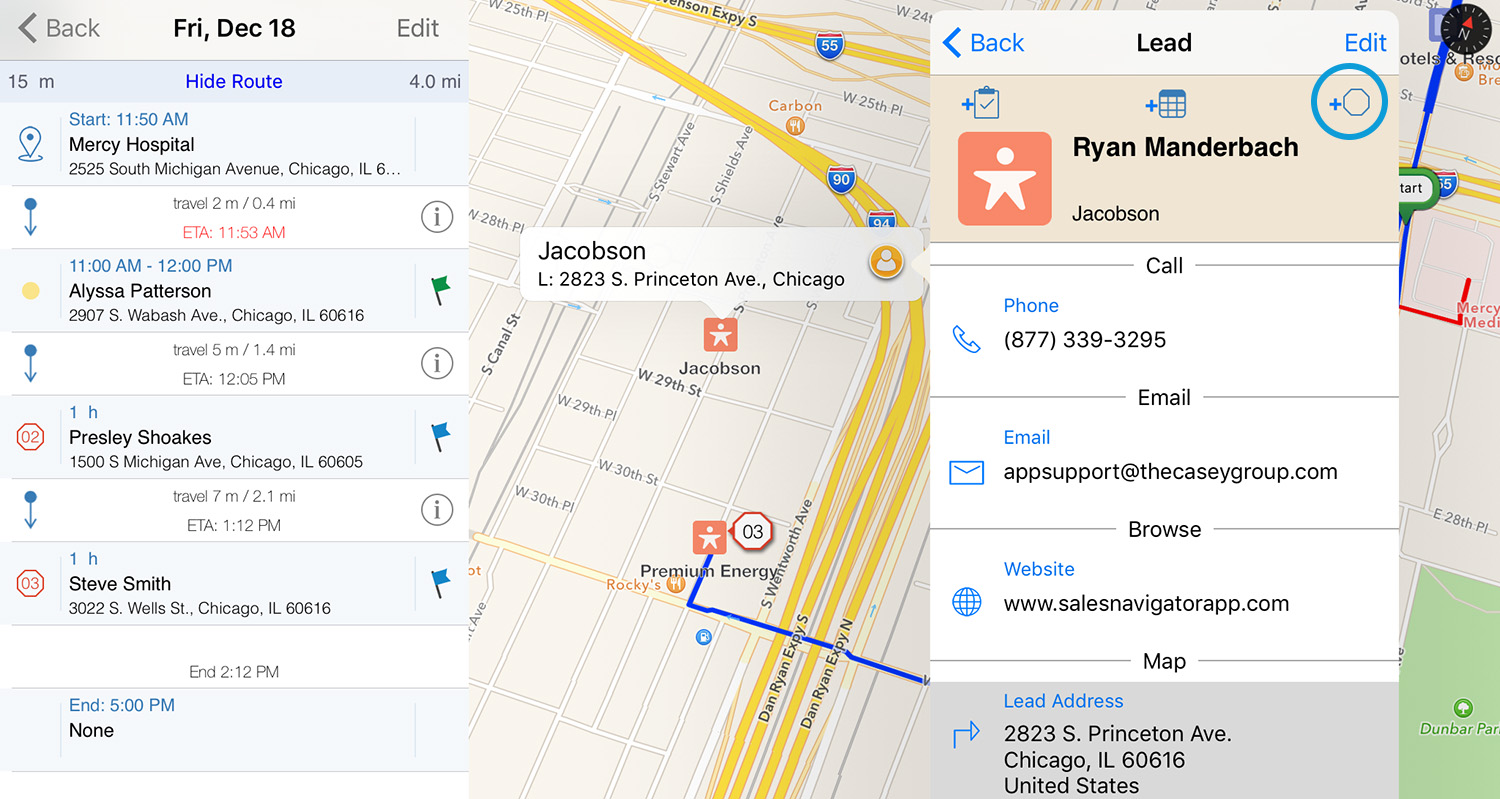
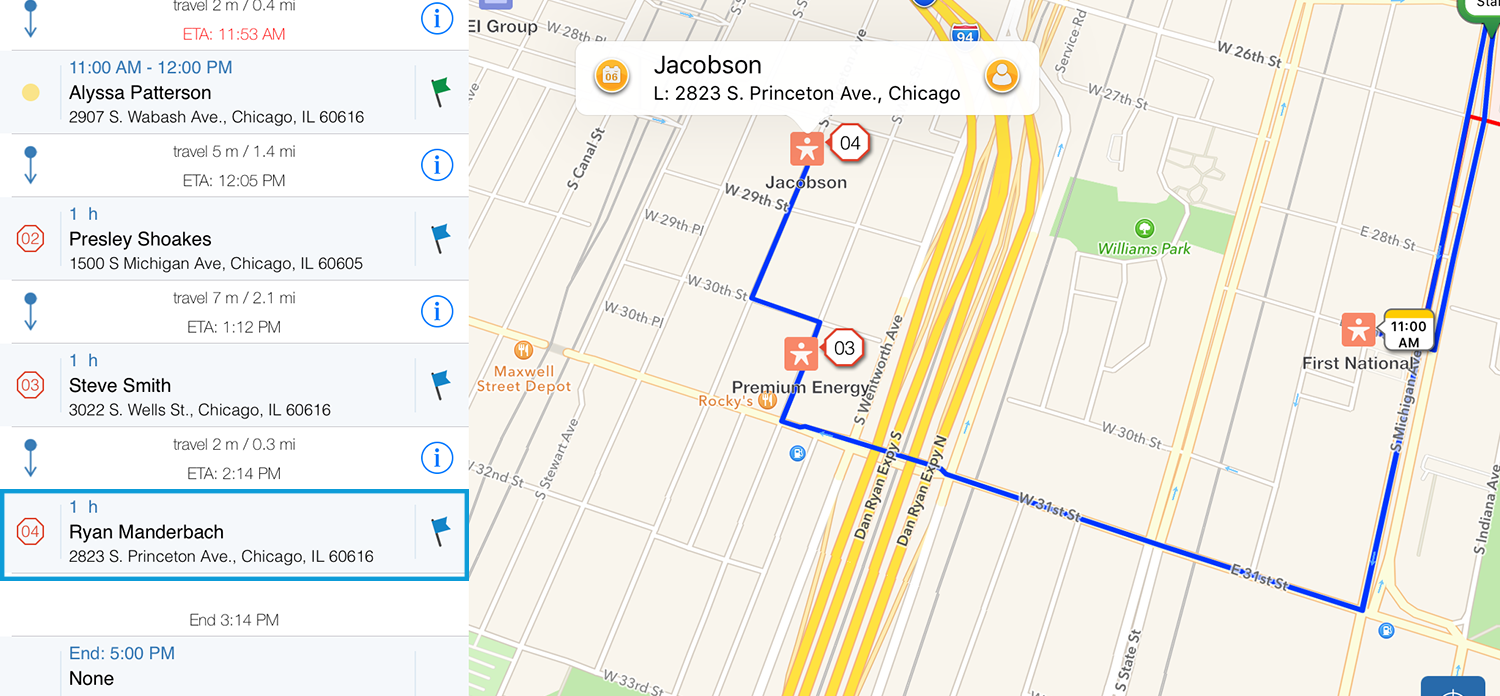
Adding an Appointment/Meeting Task to Your Route
Let’s say you have a planned route for the day and want to add a nearby stop along your route. The best way to do this is to tap the contact pin, open the contact details window and tap either the add appointment (![]() ) or meeting task (
) or meeting task (![]() ) quick button icons.
) quick button icons.
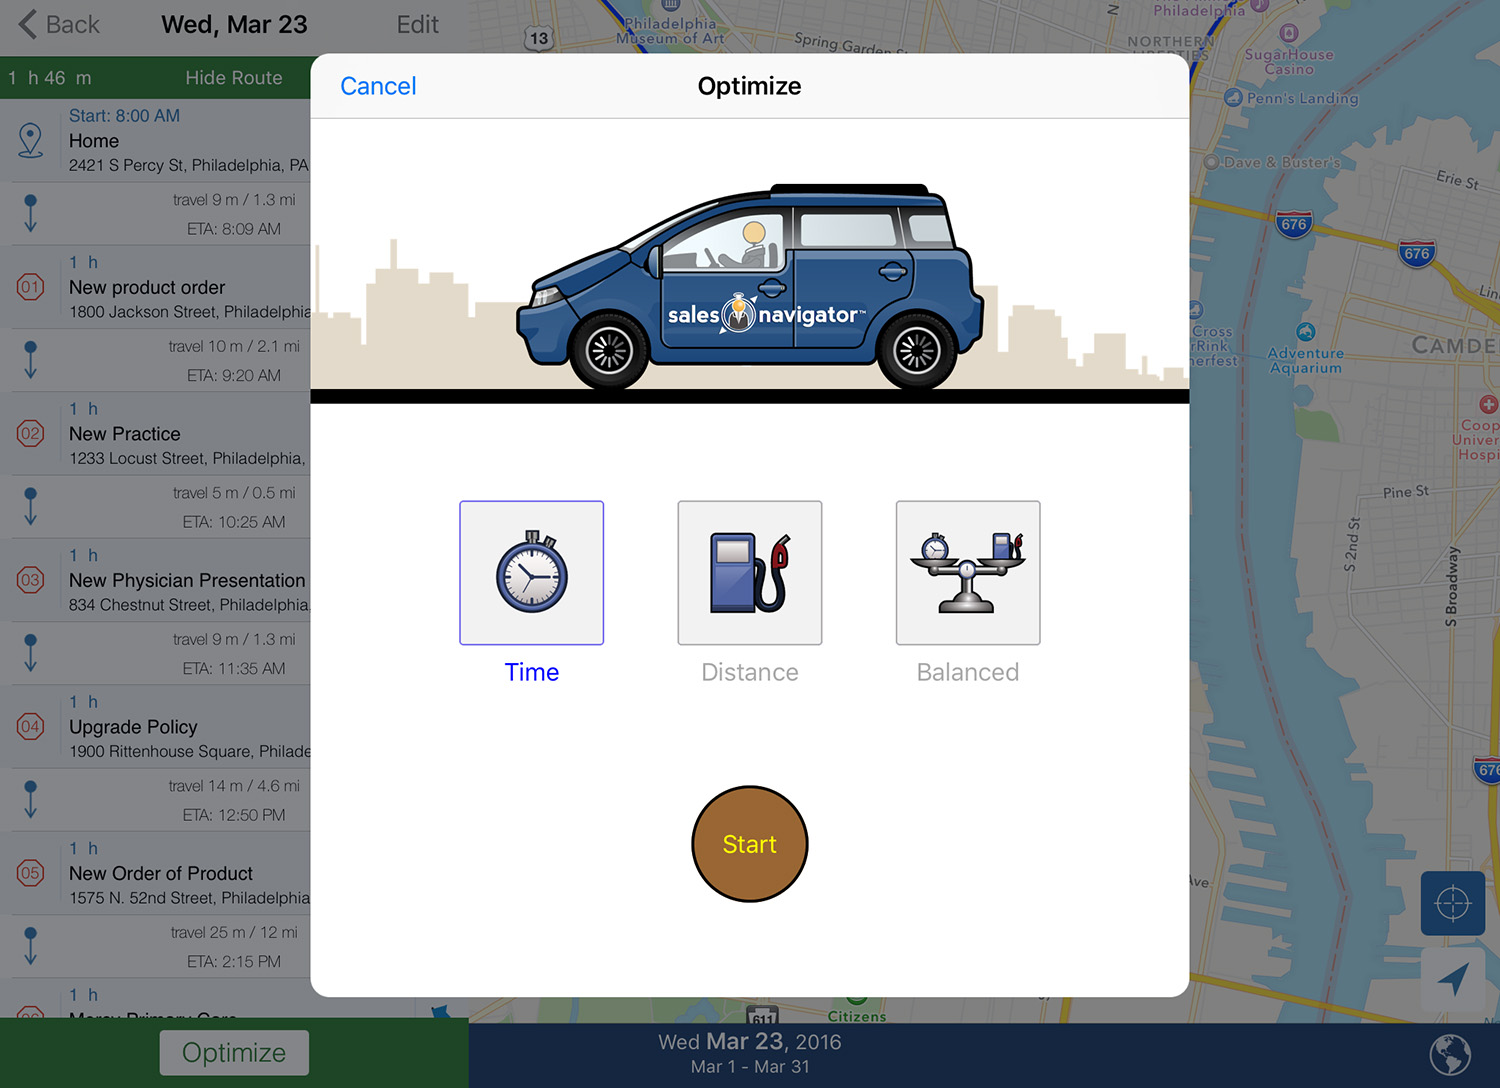
Using Sales Navigator’s Schedule Optimization
To use Sales Navigator’s Schedule Optimization, simply tap the green ‘Optimize’ button at the bottom of the trips window. Choose between three different optimization options: ‘Time’, ‘Distance’ and ‘Balanced’. Where, time favors the fastest route, distance favors the shortest distance and balanced combines the two.
After you have optimized, your trip will be rearranged and you can see where you can be more efficient on the road.
Thanks for using Sales Navigator for Salesforce! Please contact us if you have any more questions or feedback!