
Sales Navigator for Salesforce’s trip functionality helps users plan and optimize daily sales and service routes. In this post, learn how to:
- Get Started with Trips
- Navigate the Trips Menu
Getting Started
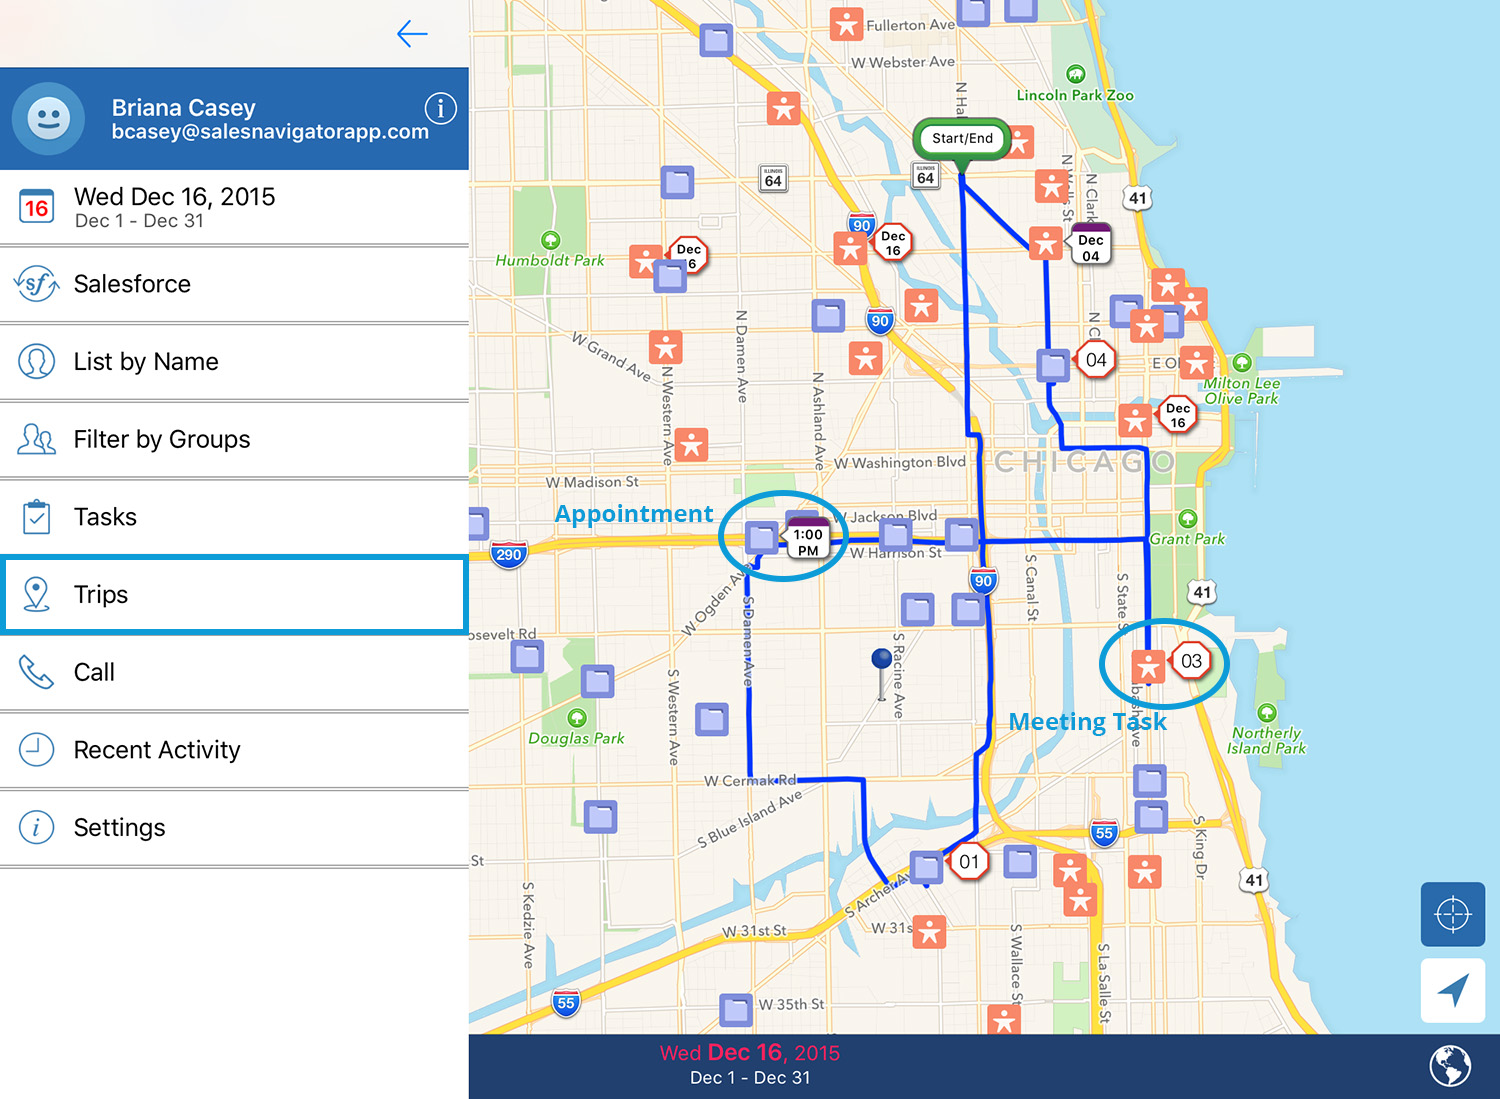
Trips are created using set calendar appointments from iCal and daily meeting tasks from Salesforce with no set times.
The trips menu will automatically be populated with appointments and meeting tasks from Salesforce as long as they have a location. If there is no location associated to the tasks or appointments, they will not show in the trips menu, but in the task list.
On the map, appointments are represented with an appointment flag showing the calendar color and time. Meetings are represented with a stop sign showing the order in which they appear in the trips list. Lastly, if you have the calendar range view on, you can see future and past appointments within the range, so you know who you have visited.
To access the trips list, open the app menu and tap the trips menu icon ( ![]() ).
).
Trips Menu Overview
Main Menu Features:
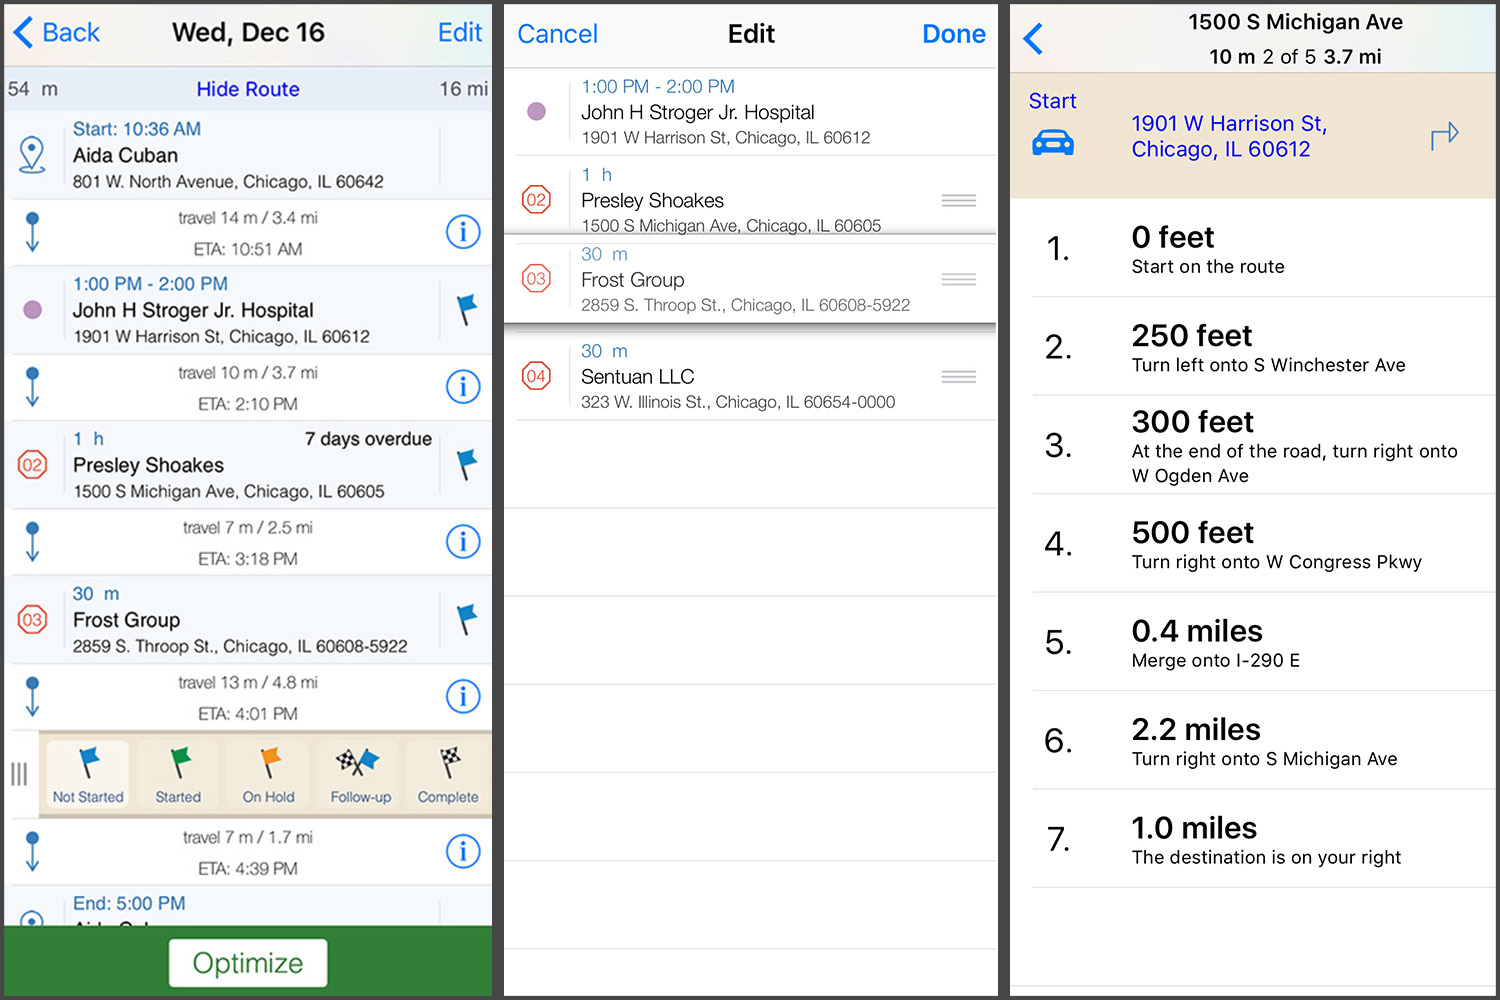
- Hide Route/Show Route– Tap ‘Hide Route’ to hide the route on map or ‘Show Route’ to show the route. You can also tap the route icon (
 ) to turn specific route segments on/off.
 - Trip Information– At the top of the menu and in between each stop you will see information about your upcoming trip such as ETA, distance and travel time.
- Start/End– Set your start and end times/locations for your trips to make a complete route. Set location quick buttons in the app settings.
- Status Flags– Tap the status flags set the status of your meeting tasks in Salesforce. (An appointment status cannot be changed, but will be set to complete after the time has elapsed).
- Directions– Tap the information icon (
 ) to view a direction list. Tap the arrow icon (
  ) to export the locations for turn by turn directions.
 - Edit Routes– Tap the ‘Edit’ button to reorganize your meeting tasks. Appointments can only be edited by changing the time since they are fixed.
- Optimize– Tap the ‘Optimize’ button to reorganize your route by distance and direction.
Thank you for using Sales Navigator for Salesforce. Still have questions or feedback? Contact us here.