
Use Sales Navigator to Plan your Summer Travel

Summer vacation season is on the horizon as kids wrap up their last days of school and parents are eager to hit the road be it via driving or flying to their desired destination. Although we all try to disconnect from work for a bit, there will be one “work” related program which I will be happily taking along on my trip – Sales Navigator.
Don’t let the name fool you… Sales Navigator is great for planning any type of travel. In my case it will become “Vacation Navigator!” The same benefits I enjoy while traveling for business (an optimized schedule, reduced travel time, an organized sales visit plan) will all apply to my vacation planning.
Create a Contact Group for your Destinations
I always invest quite a bit of time researching where we will vacation and creating a list of destinations to visit once we arrive – tourist attractions, restaurants, activities, etc. This year I simply made a new group in my iCloud contacts entitled “Summer Vacation.” It’s helpful to have these contacts saved to my iPhone because often I end up sharing them with others as we trade future vacation suggestions.
As I researched where we might like to visit, I looked up the locations in my Apple Maps app, and then created a new contact for it. For example, living on the East Coast a “must visit” for my family when traveling out West is In & Out Burger. I searched “In & Out Burger” and then scrolled down the listing to “Create a new contact.”

When I was finished adding contacts for my “wish list” I simply moved them all of the contacts into my iCloud “Summer Vacation” group to avoid any clutter with my regular iPhone contacts.
When in Sales Navigator, I selected Settings and then tapped Choose Groups to Sync and chose my Summer Vacation group. The destinations automatically appeared on my map with their own group filter. Whenever I had some free time (aka vacation daydreaming) I just tapped on the Summer Vacation group and began to get an idea of our itinerary.
Plan your Visit Schedule
I set our daily starting location under “Trips” to our hotel address so each morning we would start from that location and return there at the end of the day. Then I simply selected each calendar day of our vacation and either set an Event time for a visit or noted somewhere we wished to stop by on a given day. As I organize my itinerary I can see my stops and directions between each attraction.
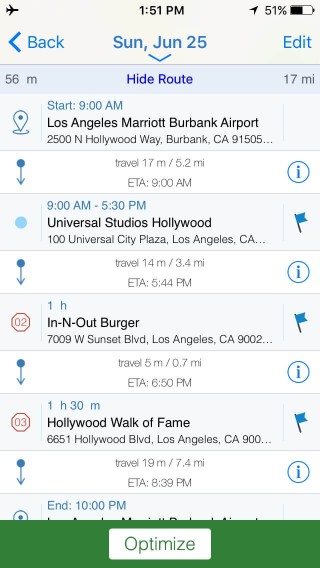
Since I will definitely need directions I can simply tap the information icon in between each listing to jump into my desired navigation program (Apple Maps, Google Maps, or Waze) to receive turn-by-turn directions.
Relax and Enjoy your Trip!
Just like when I use Sales Navigator for my sales route planning, all of my vacation information is at my fingertips and accessible even if I am offline. My trip is planned so I can use my valuable vacation time enjoying activities with my family!

If you need any assistance creating your trip itinerary, some helpful links to Sales Navigator guides that cover the steps I utilized are listed below.
3. How to create and optimize routes
I hope this information helps you to utilize Sales Navigator for your vacation this year! We hope you enjoy your well-deserved time off. We’d love to hear feedback regarding how you used your app for your vacation so please share any input with us. We wish you safe travels!
Ready to get started?
Try Sales Navigator for free on the iTunes App Store. Looking to purchase Sales Navigator for a large sales team or curious about a CRM integrated version? Request a demo to learn how Sales Navigator can help your team.