
How to Use Apple Maps to Find New Customers
Finding new sales leads is a key part of any sales cycle. Successful sales professionals recognize that they need to constantly refill their funnels with new opportunities so that they can close more sales. Strive to accumulate as many new leads as possible through many different channels.
No matter how long you’ve been working your territory, I’m sure you agree that it makes sense to regularly check if any new businesses have opened, or if there are businesses that didn’t make it onto your original target territory list. Don’t miss an opportunity to stop by and establish an introduction! It’s as easy as 3 taps to add a new sales target to your Sales Navigator app!
An easy, no cost way to find new leads
Using Apple Maps on your iPhone or iPad, you can quickly search for nearby opportunities and automatically add them to Sales Navigator.
If your targeted businesses fall into one of Apple Map’s eight main categories (Food, Drinks, Shopping, Travel, Services, Fun, Health, or Transport) simply tap on the associated icon below the search bar. You’ll see that each category then lists even more defined business groups. If your target business type doesn’t fit into one of the main categories, simply enter the search term, whether it is Optometrist, Opera House, or Oral Surgeon!
One recent Sales Navigator user was a dental device rep reviewing all local dental offices. She searched Apple Maps for “Dentists” and found over 20 dental offices near her location.
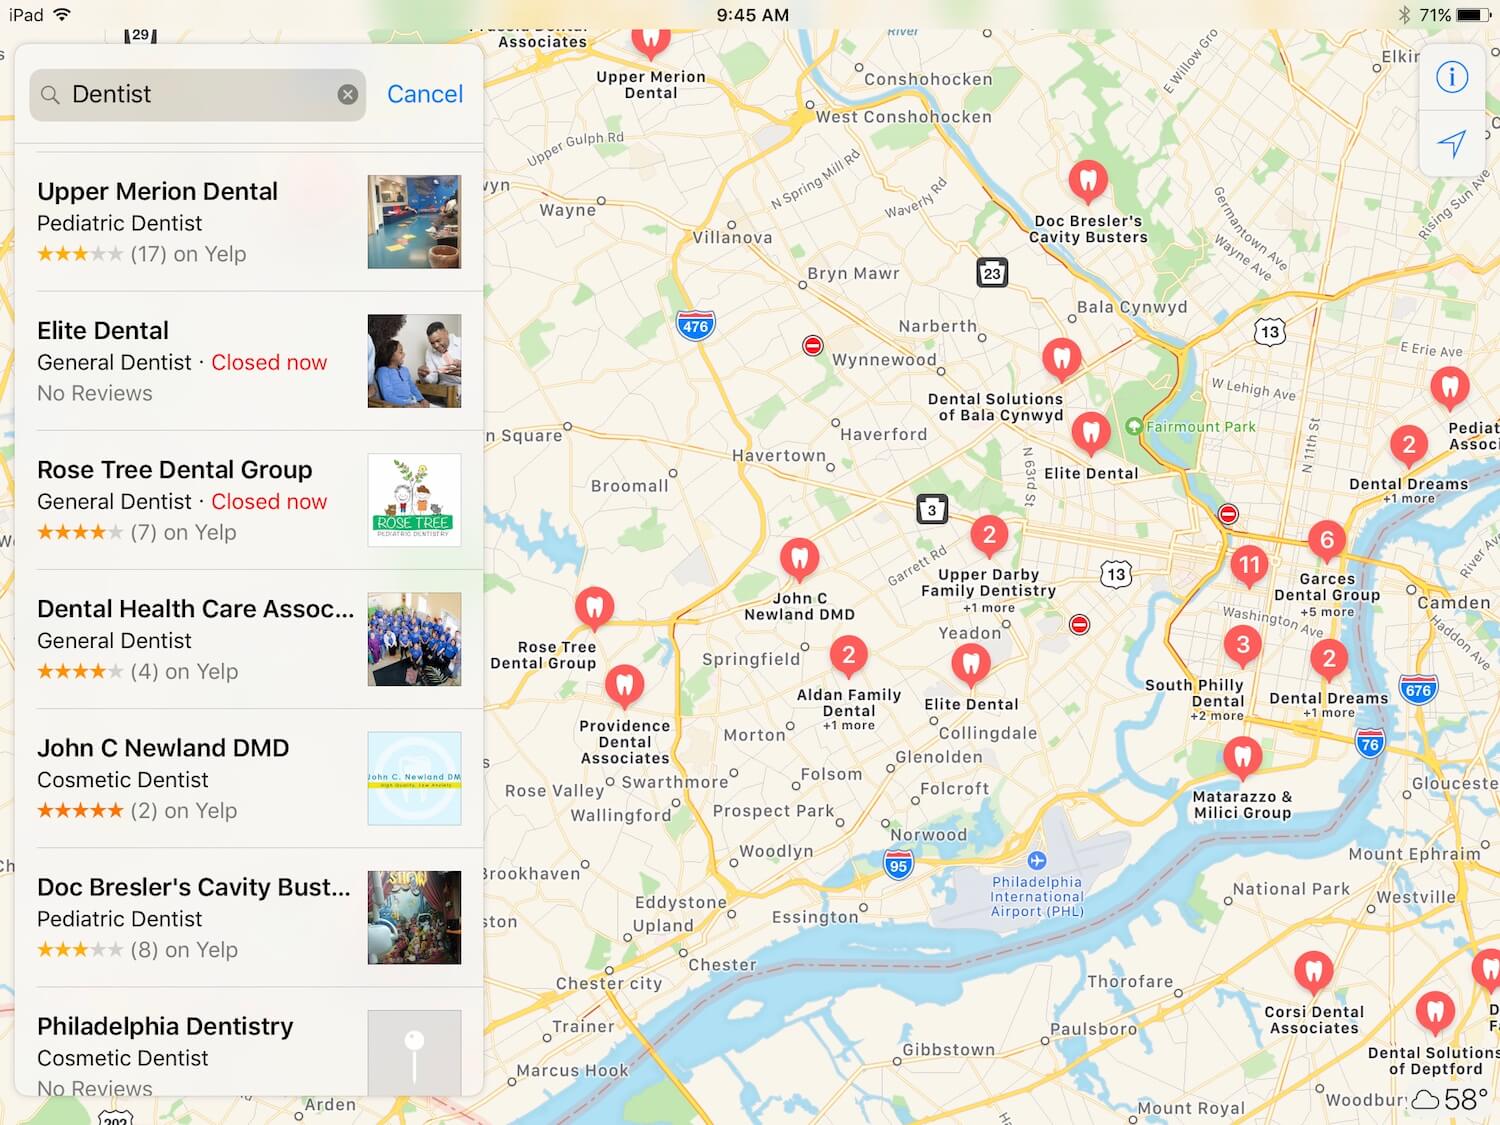
A search for “Dentists” in Apple Maps
She scrolled down the list to see if there were any offices she could add to her territory prospect list, and any new ones she found were added with only 3 taps:
- Tap the business name listing in Apple Maps
- Scroll down the record listing to select “Create New Contact”
- Tap “Done”

Creating a new contact in Apple Maps
The contact was added to her iPad contacts app and automatically synced with her Sales Navigator app. The contact record included all the data residing in the Apple Maps listing, such as address, phone number, URL, etc.
Viewing your new leads in Sales Navigator
First, if you haven’t already, make sure that contacts from the Contacts app are synced with Sales Navigator. If you have business and personal contacts on your device, you can set up groups within the Contacts application and then select only those groups with the prospects you want to map in Sales Navigator.
To review your set up in Sales Navigator, open the main menu and go to “Settings”. Then, tap “Choose Groups to Sync” to confirm that the ‘Default Source’ group is selected. Doing this will pull all contacts into Sales Navigator. If you do not want all contacts synced, make sure to create specific groups in the Contacts app and only select those as mentioned above!
Use the “List by Name” option from the main menu to search for your new prospects and open the associated contact record details. From the contact record, you can also add the new contact to any custom group that you have set up, such as “New Dentists.”
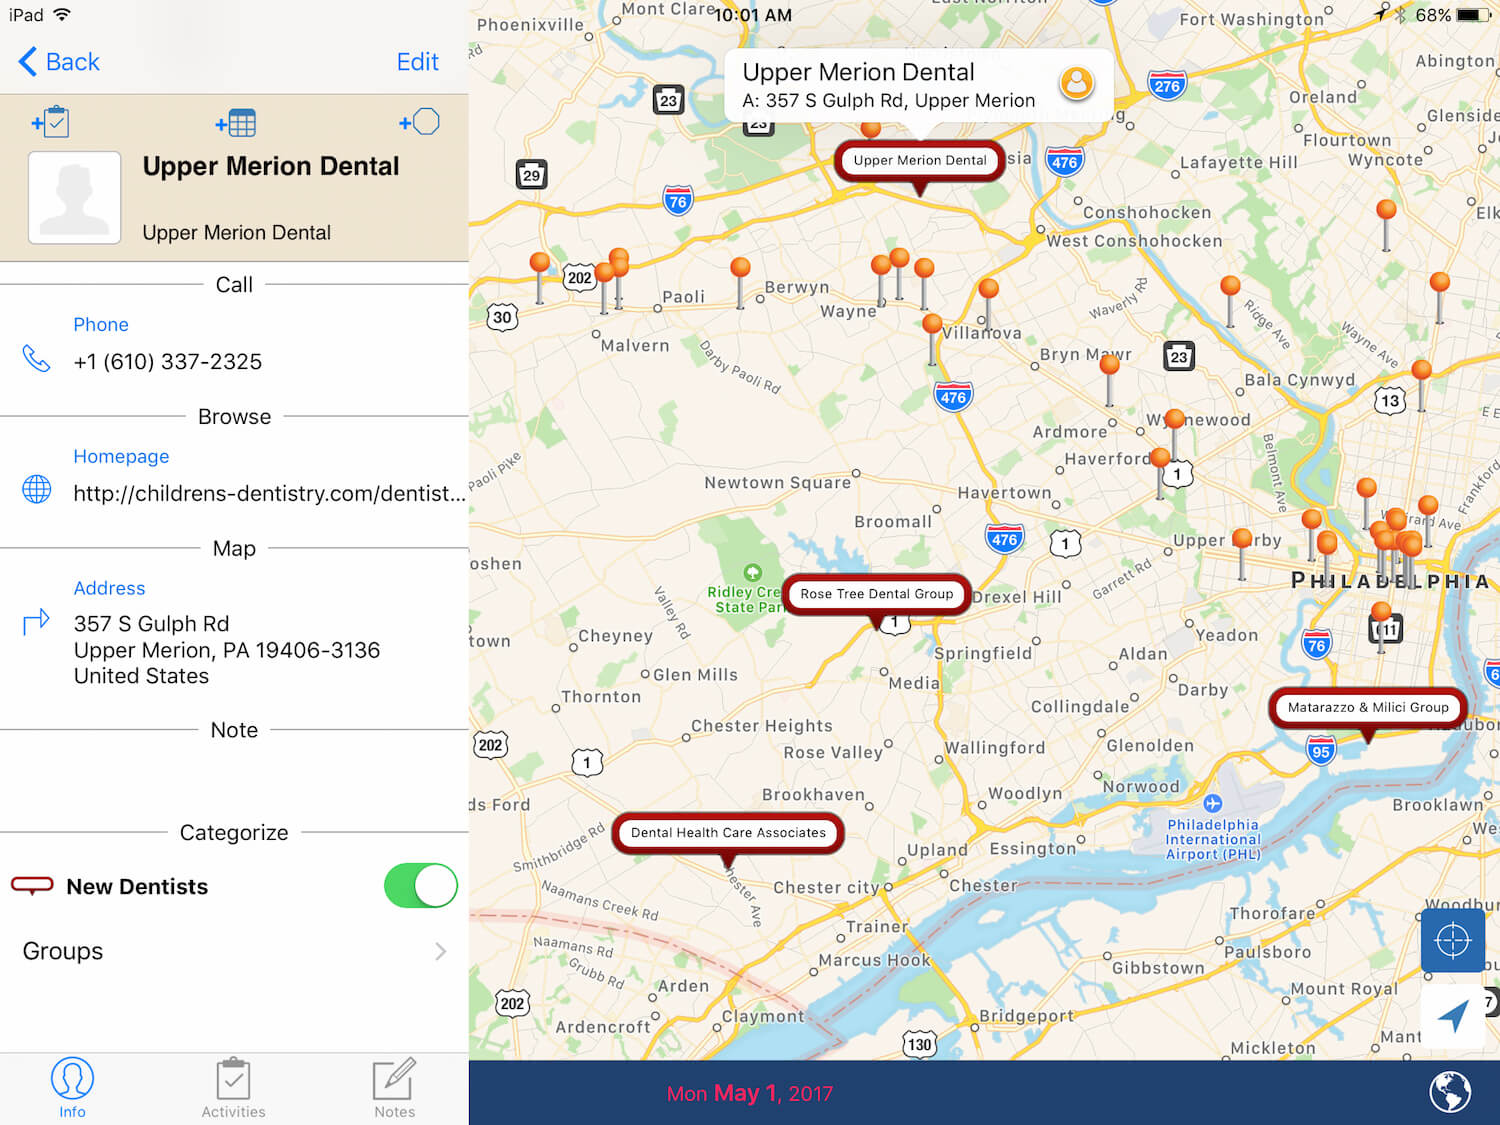
The new contact syncs into Sales Navigator
Now you are all set to visit your new prospects the next time you are in the vicinity! We appreciate the opportunity to support your sales success!
Ready to get started?
Try Sales Navigator for free on the iTunes App Store. Looking to purchase Sales Navigator for a large sales team or curious about a CRM integrated version? Request a demo to learn how Sales Navigator can help your team.